What is escrow and why does it matter?
Escrow means your money is held by a smart contract — not by a person, not by a company, and not by a bank. When a client funds a project on GigRevo, the payment is locked on the Polygon blockchain until the work is delivered and approved. The freelancer can't take the money and disappear. The client can't refuse to pay after receiving the work. The smart contract enforces the deal.
GigRevo charges a flat 2% fee on every completed payment. The fee is taken from the freelancer's payout — the client funds the exact project amount, nothing more. On a $1,000 project, the freelancer receives $980 and GigRevo keeps $20. That's it.
Before you start
You need:
- A browser (Chrome recommended)
- A GigRevo account (sign up at gigrevo.com)
- A wallet with USDC or USDT on Polygon (if you're the client)
A note on getting tokens into your wallet: If you're coming from a centralized exchange like Binance or Coinbase, you'll need to withdraw your stablecoins to your Polygon wallet address. GigRevo covers all gas fees after that, but getting the tokens into your wallet is on you.
Creating an account
GigRevo supports three sign-in methods:
- Email and password — standard registration
- Google — one-tap sign-in with your Google account
- Telegram — sign in with your Telegram identity using the Telegram Login button
All three methods link to the same account. You can start with one and add the others later. If you already use the GigRevo Telegram bot, signing in with Telegram connects your existing escrow history and wallet automatically.
Connecting a wallet
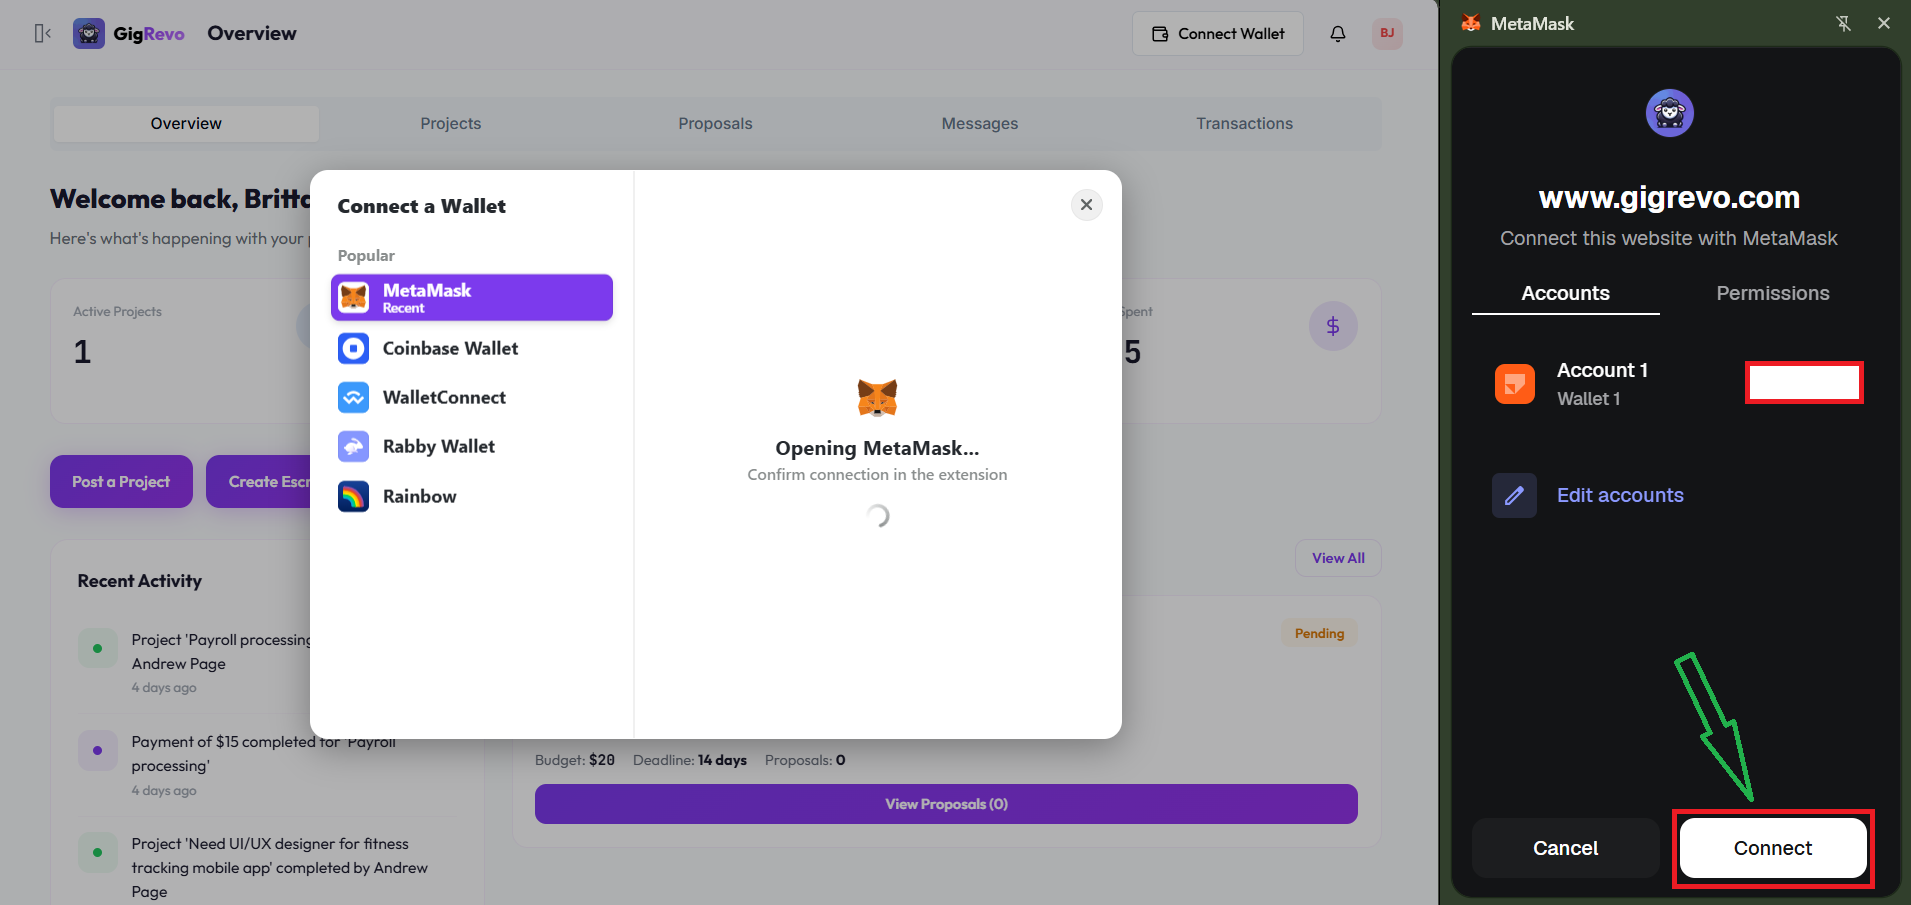
Go to your dashboard and click "Connect Wallet" in the top-right corner.
GigRevo supports five wallets:
- MetaMask
- Coinbase Wallet
- WalletConnect
- Rabby Wallet
- Rainbow Wallet
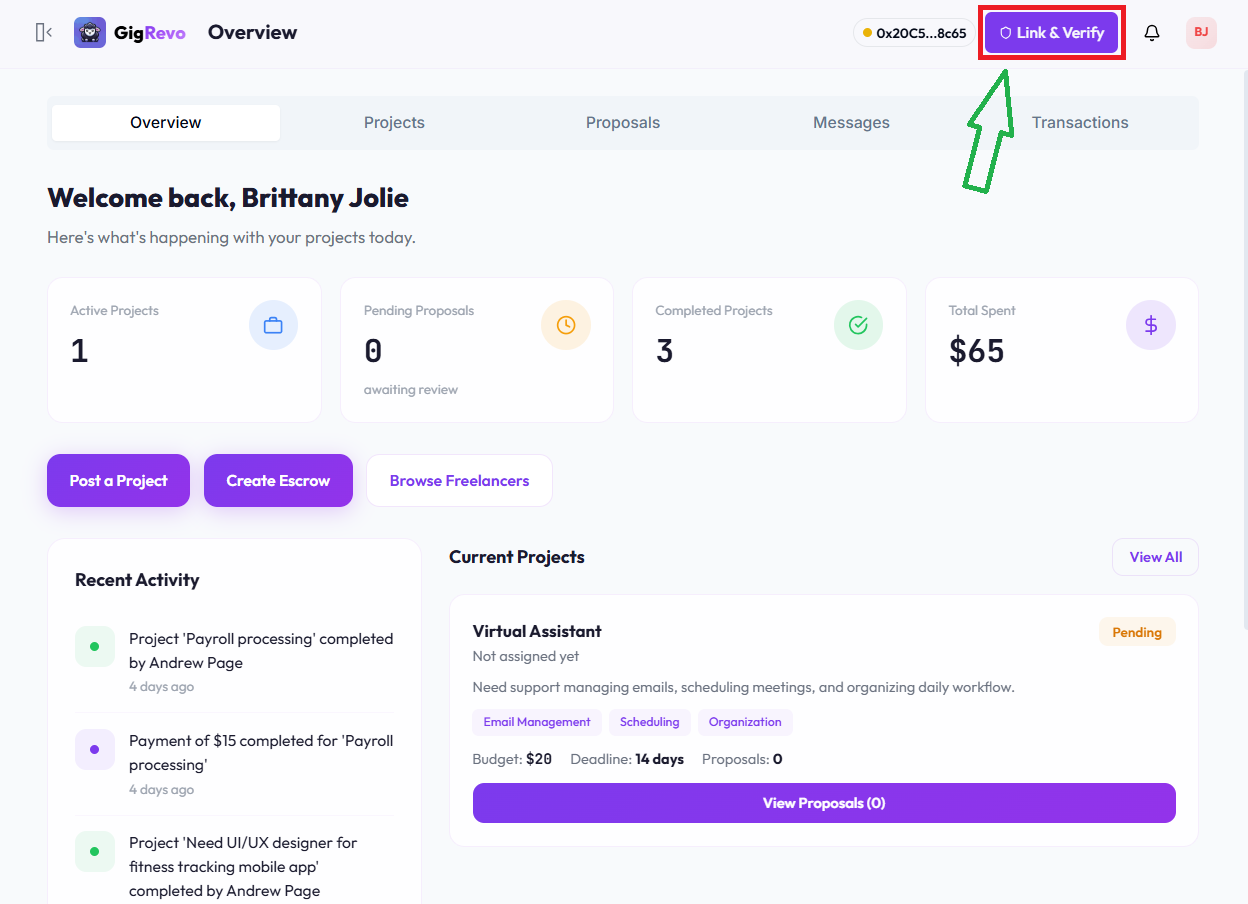
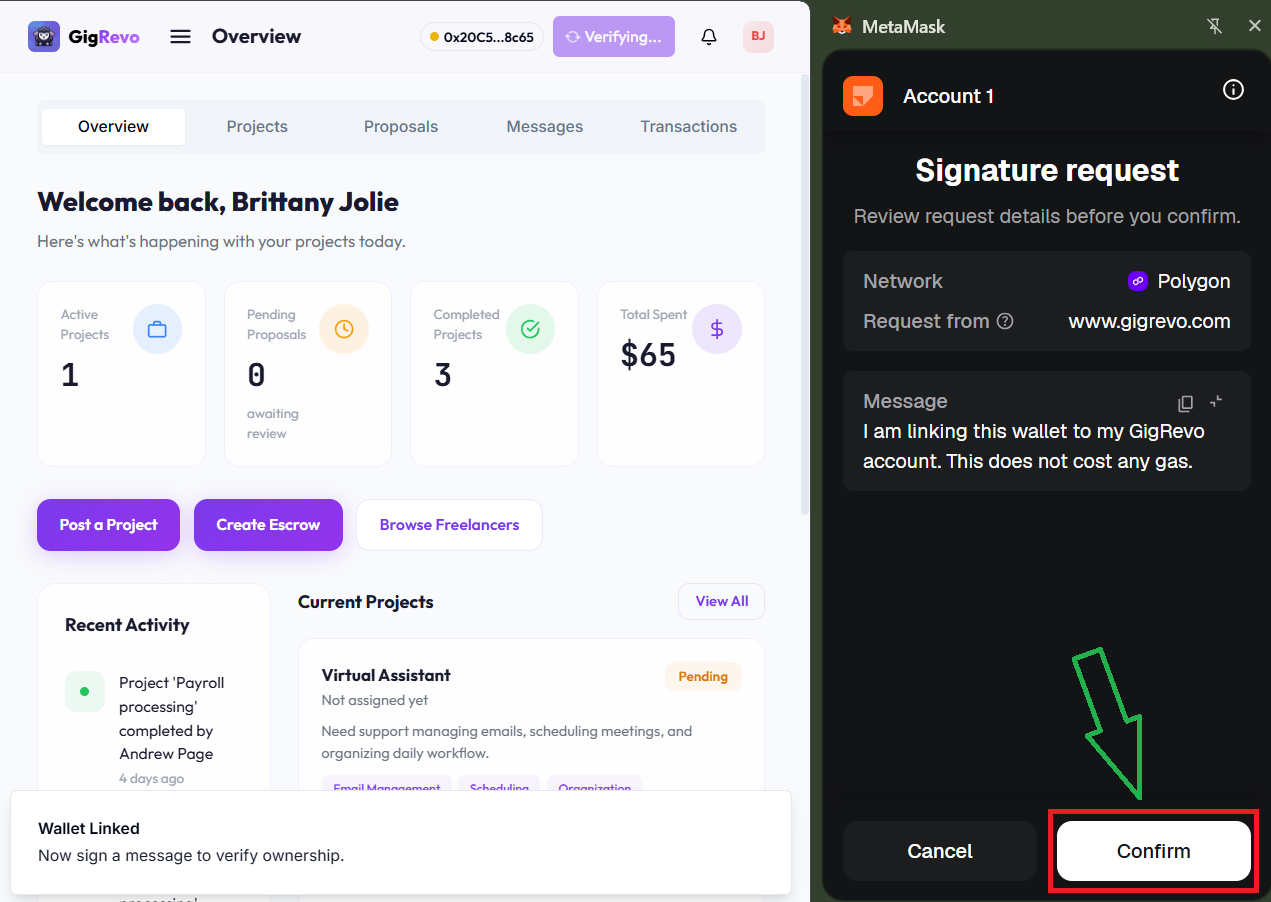
Your wallet must be on the Polygon network. After connecting, click "Link and Verify" — your wallet will ask you to sign a message to confirm the connection. This step is required for your wallet to work with escrows.
You don't need POL (gas tokens) in your wallet. GigRevo covers all gas fees through a meta-transaction relay. You sign messages, not transactions — GigRevo submits them to the blockchain and pays the gas on your behalf.
Step 1: Post a project (client) or submit a proposal (freelancer)
Clients: Create a project from your dashboard. Describe the work, set a budget, and publish it. Freelancers on the platform can browse and submit proposals.
Freelancers: Browse available projects and submit proposals for work you're qualified to do.
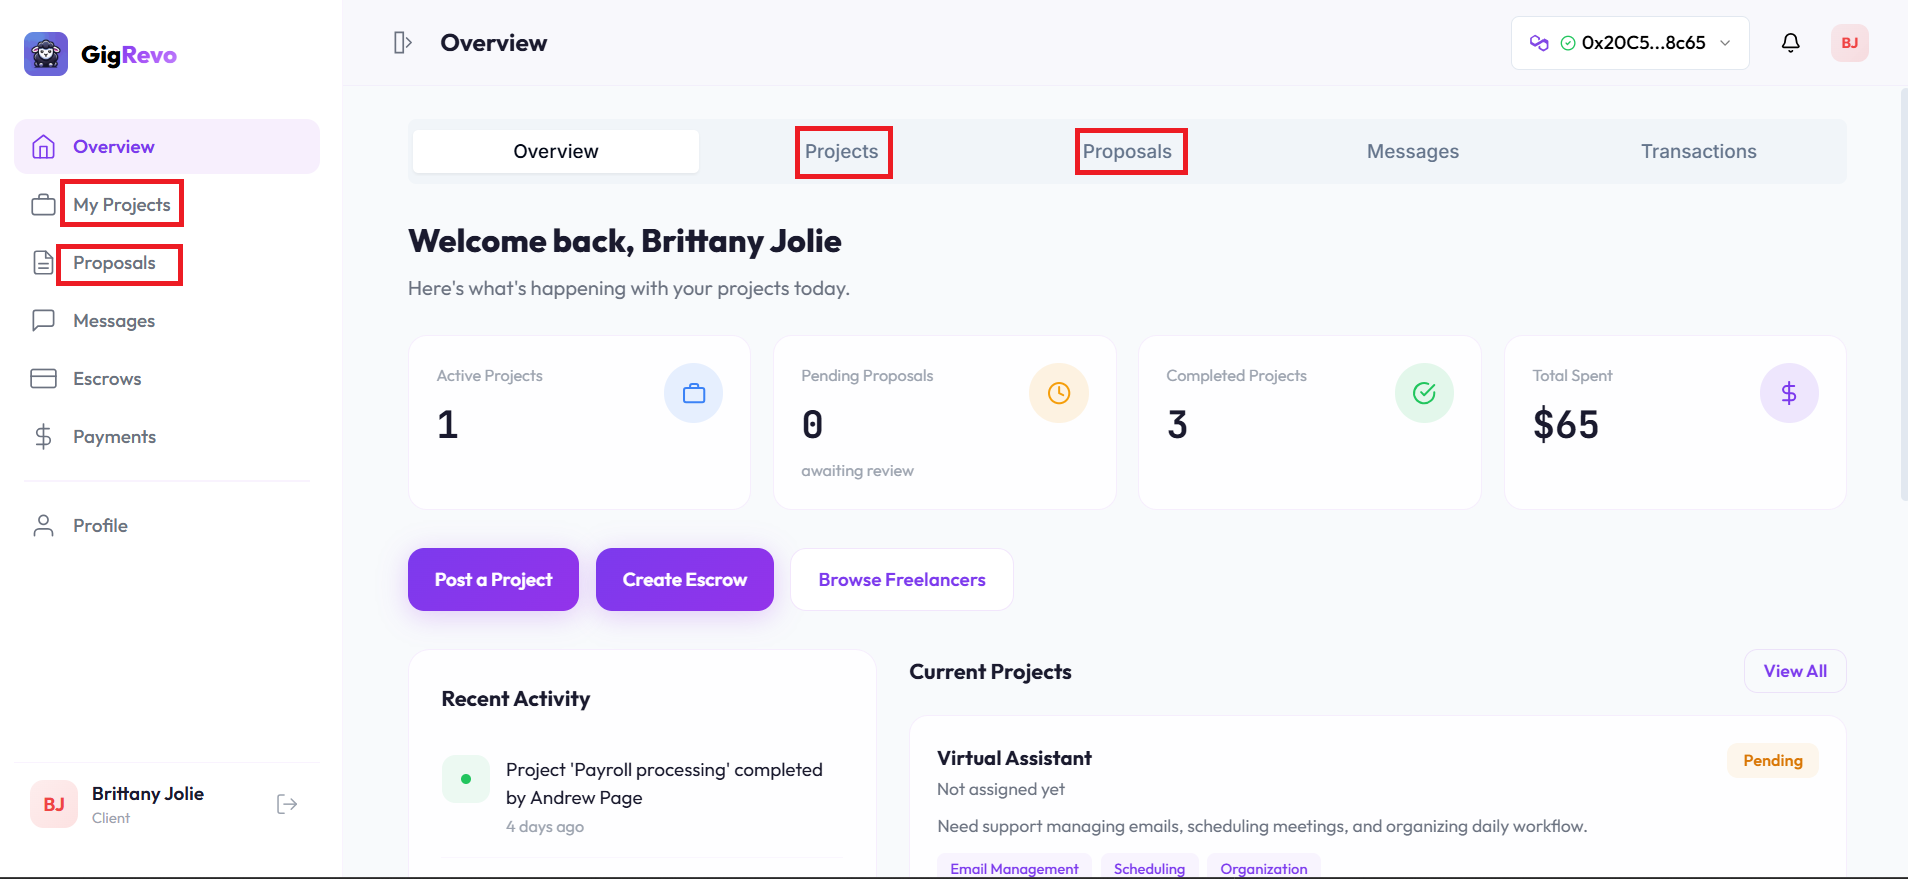
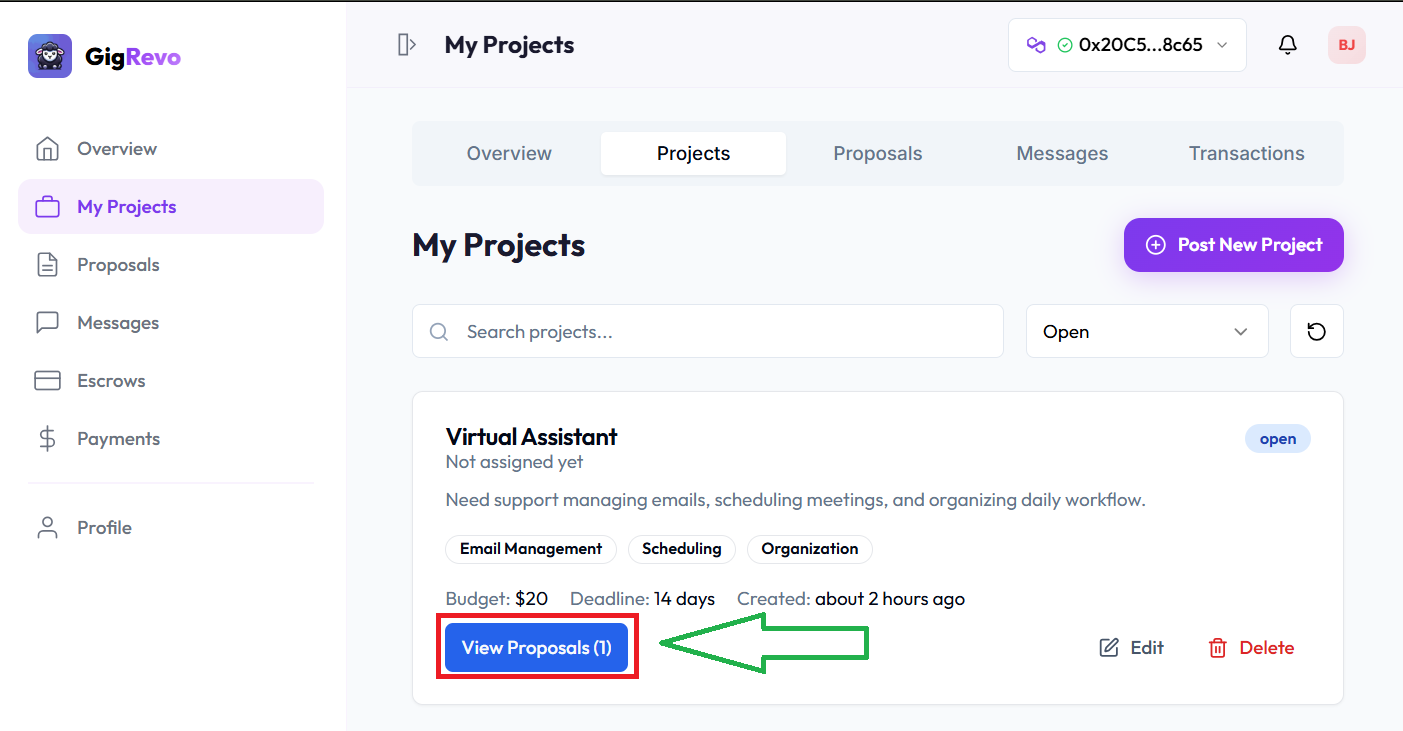
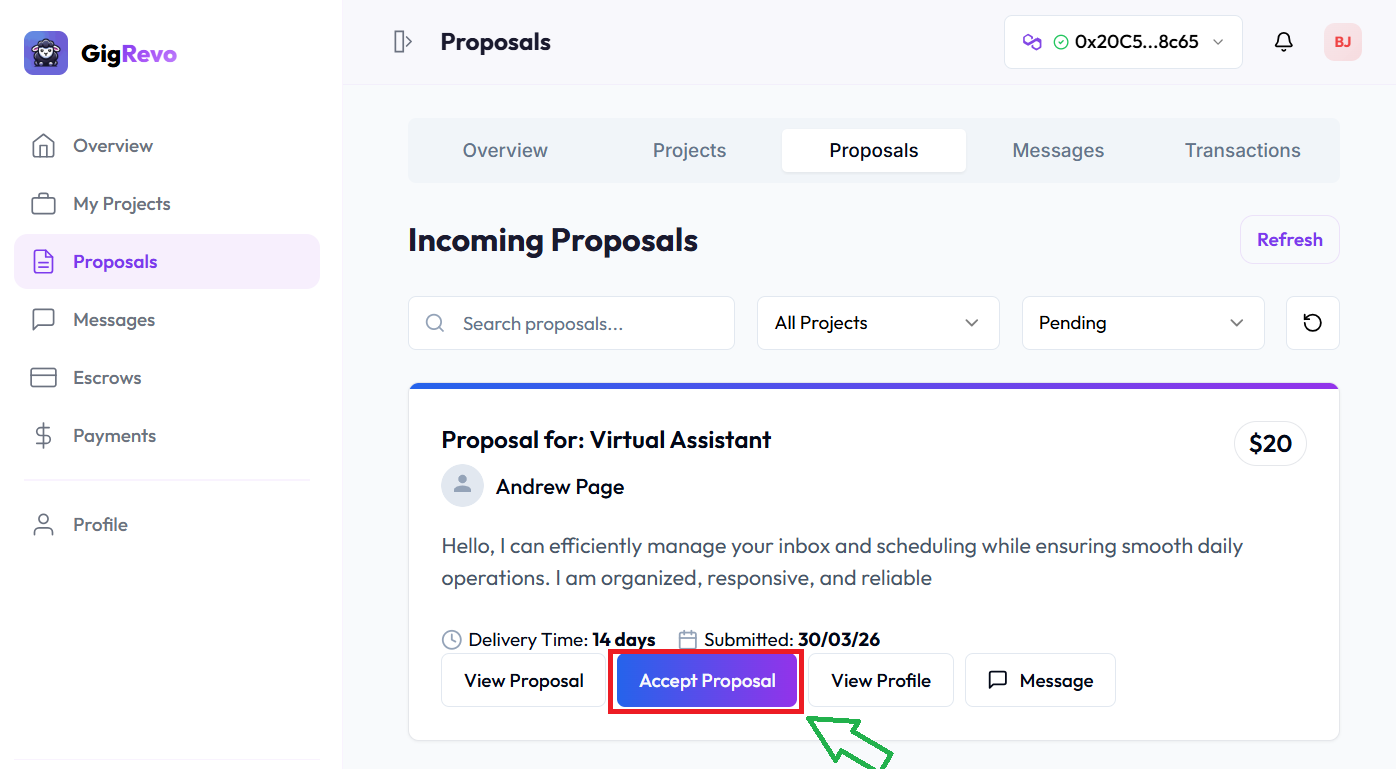
Step 2: Client accepts a proposal
Go to "My Projects" in your dashboard. Click "View Proposals" on the relevant project. Review the freelancer's proposal and click Accept or Decline.
Once accepted, the proposal status changes to "Accepted" and a "Fund Escrow" button appears on the project.

Step 3: Client funds the escrow
Click "Fund Escrow" from your project page. A new tab opens with the escrow funding form.
When you click "Fund Escrow," your wallet opens for confirmation. You'll see multiple confirmation prompts — this is normal. There are up to 4 confirmations needed to approve the token transfer and create the escrow on-chain.
You don't pay gas. GigRevo uses a meta-transaction relay to submit your transaction and cover the gas cost.

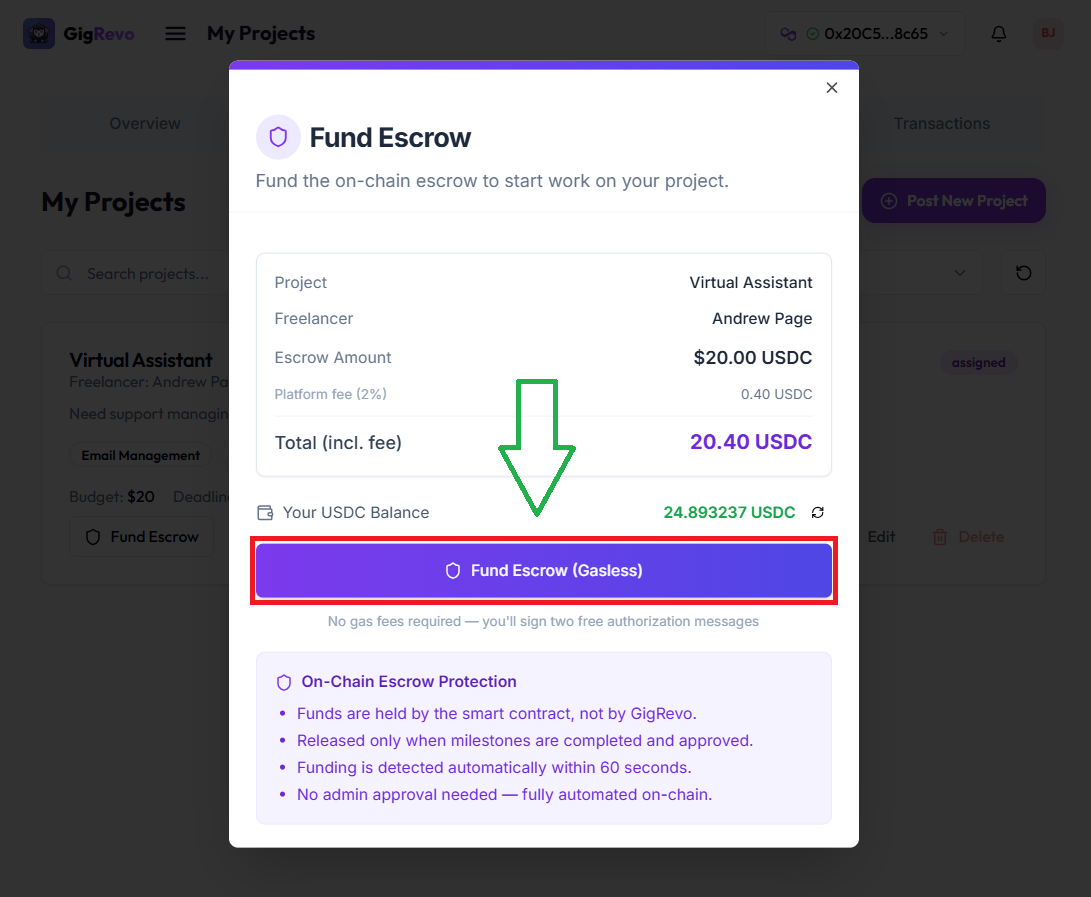

What you're actually funding: You fund the exact project amount. The 2% fee is not added on top — it's deducted from the freelancer's payout when the payment is released.
Critical: Your USDC or USDT must be on the Polygon network. Sending tokens on Ethereum mainnet, Arbitrum, or any other network will result in lost funds.
Step 4: Freelancer accepts the escrow
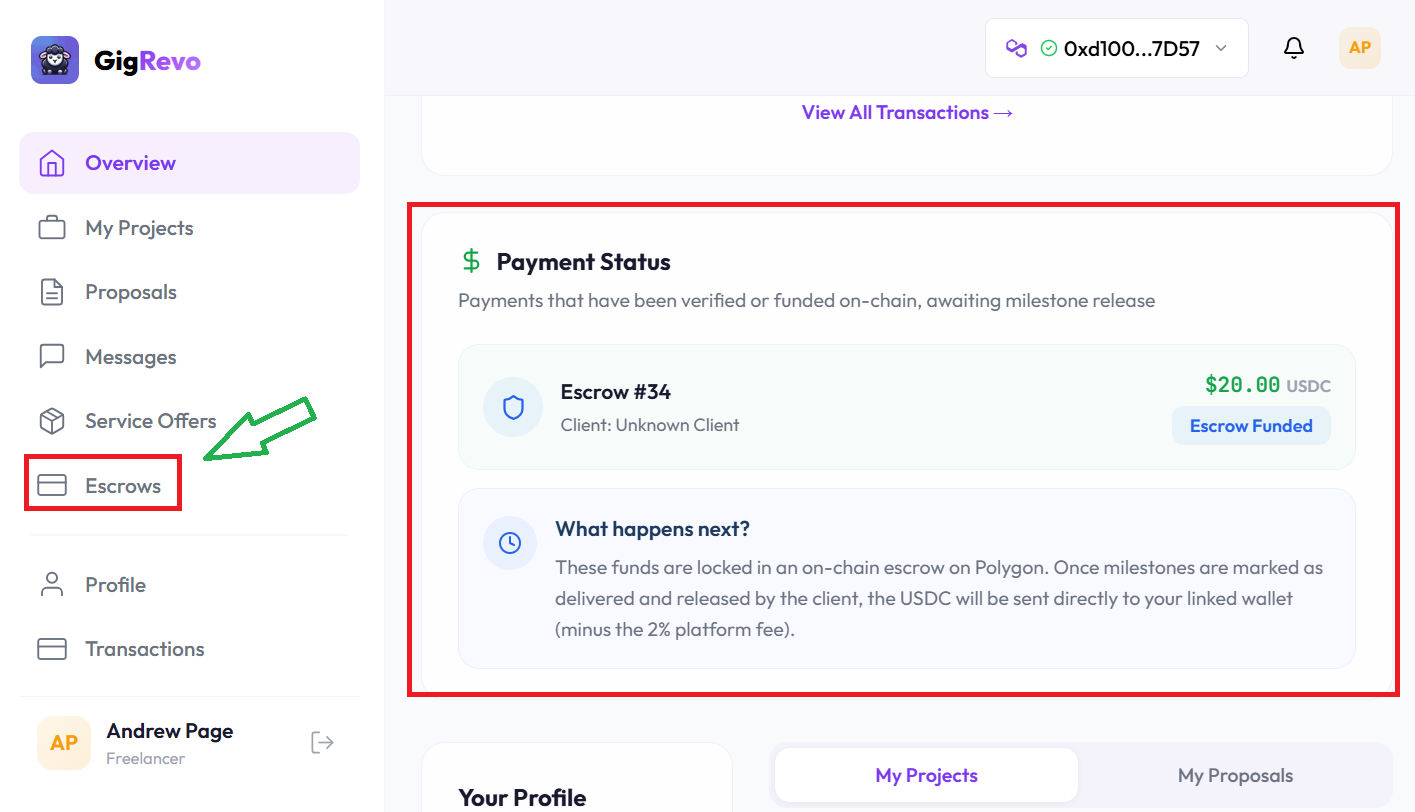
The freelancer receives a notification on their dashboard.
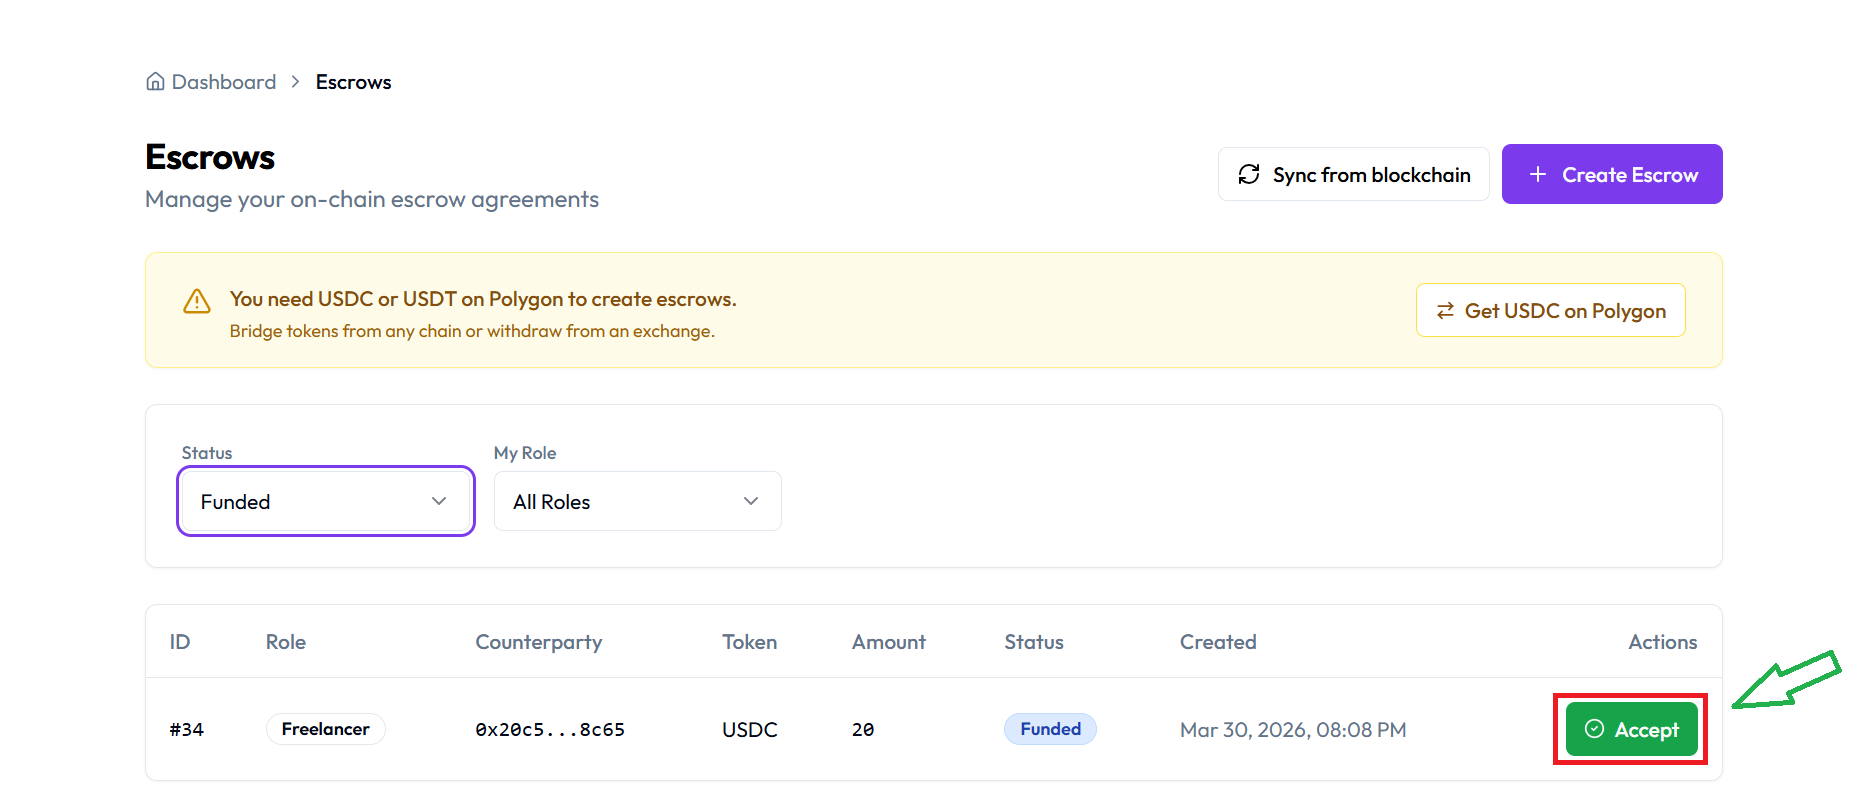
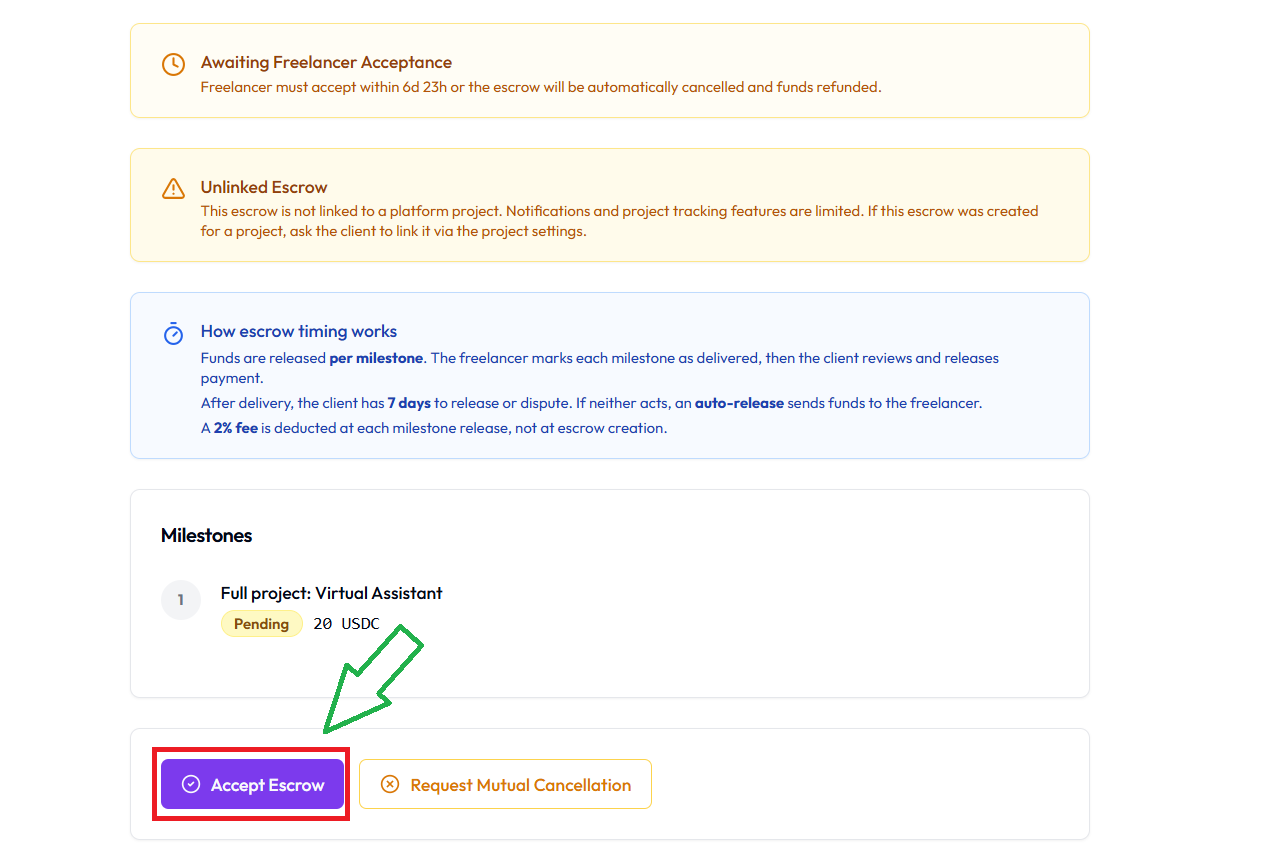
Go to "Escrows" in the sidebar. Find the new escrow and click the green Accept button. This opens the full escrow details. Scroll down and click the purple Accept Escrow button.
Your wallet opens with 2 confirmation prompts. Approve both.
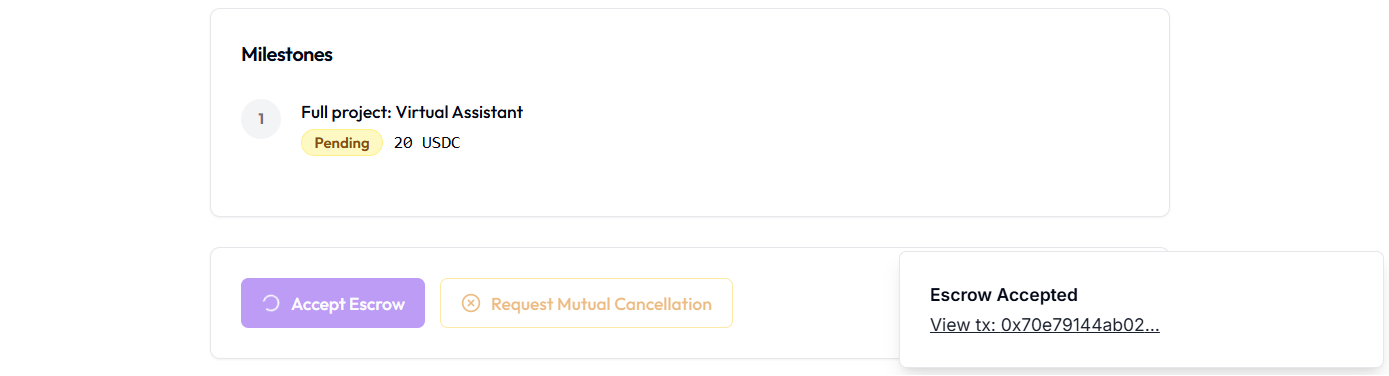
After acceptance, you'll see "Escrow Accepted" and the Deliver button appears.
What if the freelancer doesn't accept? After 7 days, the escrow is automatically cancelled and the full amount is refunded to the client.
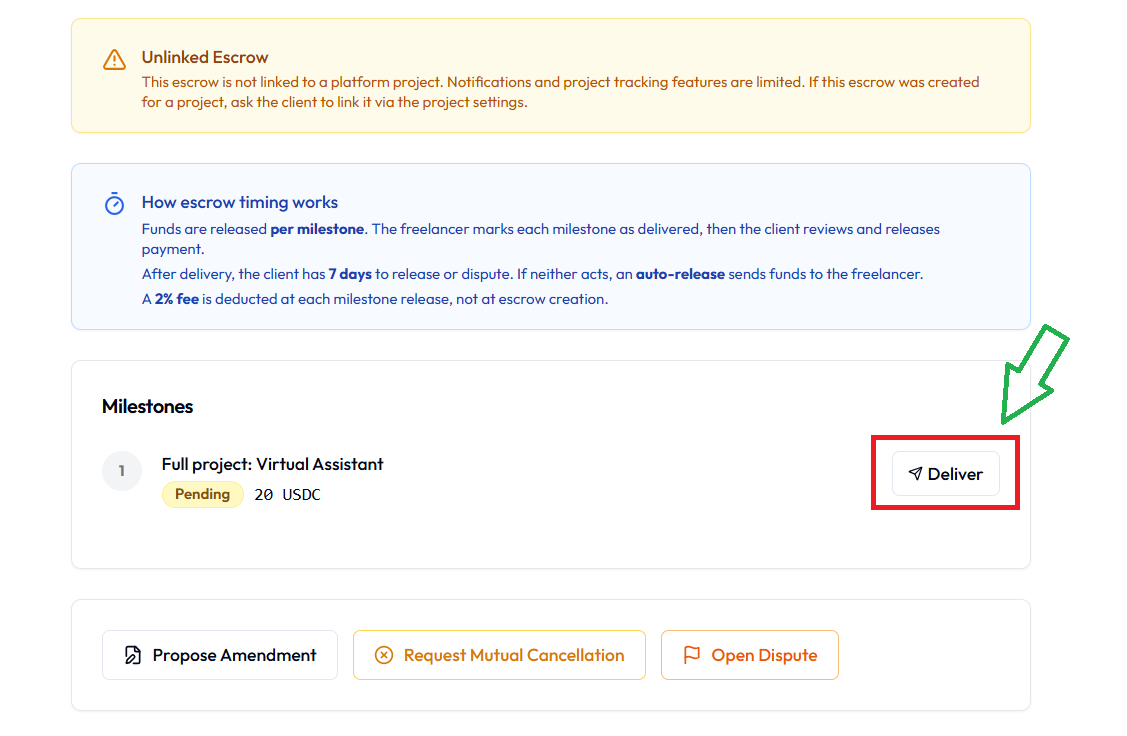
Step 5: Freelancer delivers work
When the work is complete, go to the escrow page and click the Deliver button.
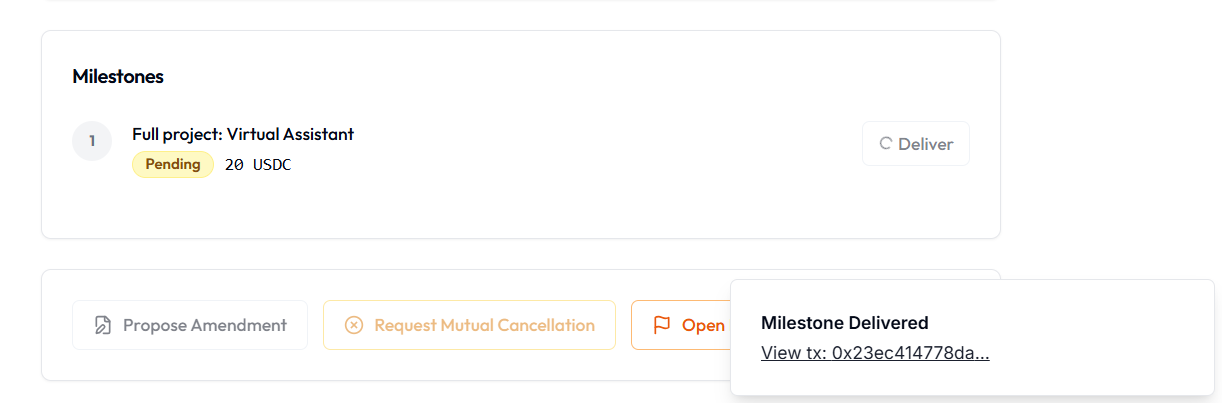
Your wallet opens with 2 confirmation prompts. Approve both.
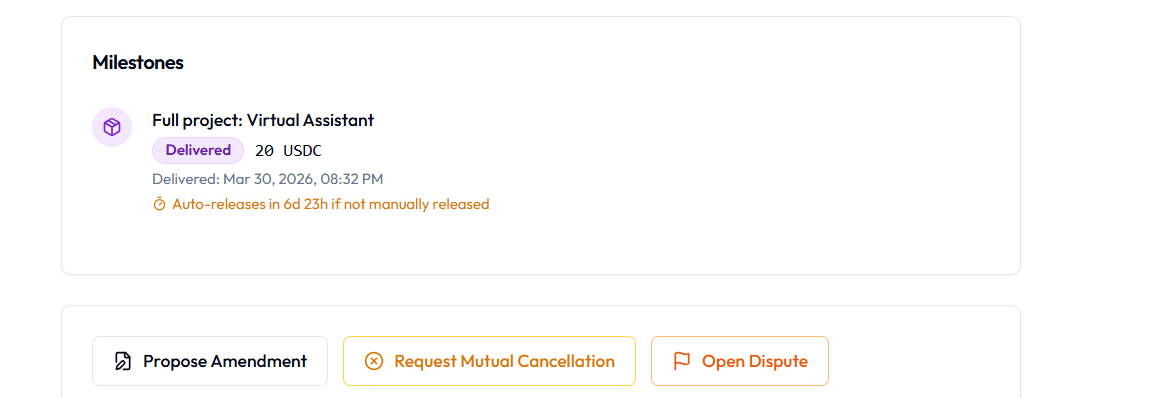
The milestone is marked as "Delivered" on-chain. The client is notified.
Only click Deliver when the work is actually complete. This triggers the 7-day auto-release countdown.
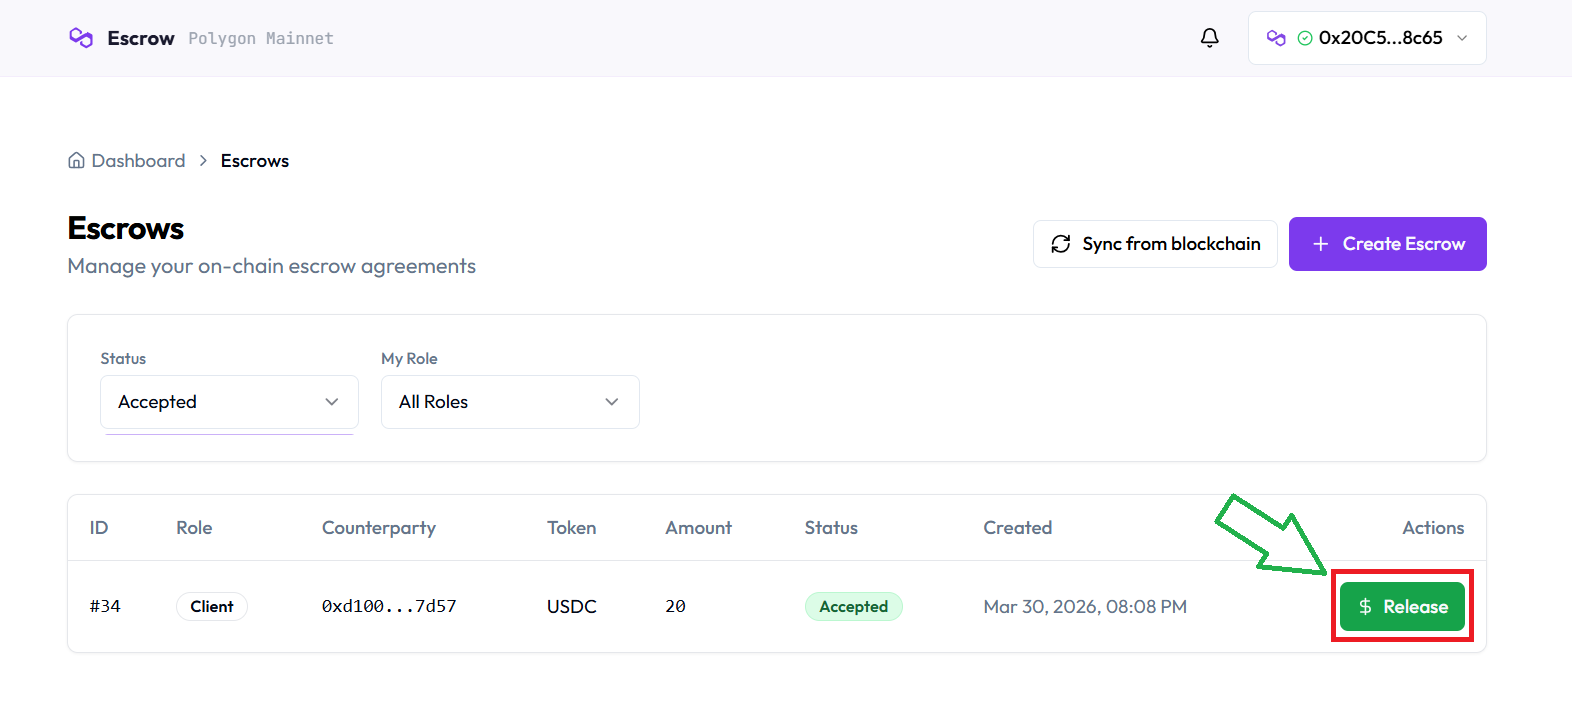
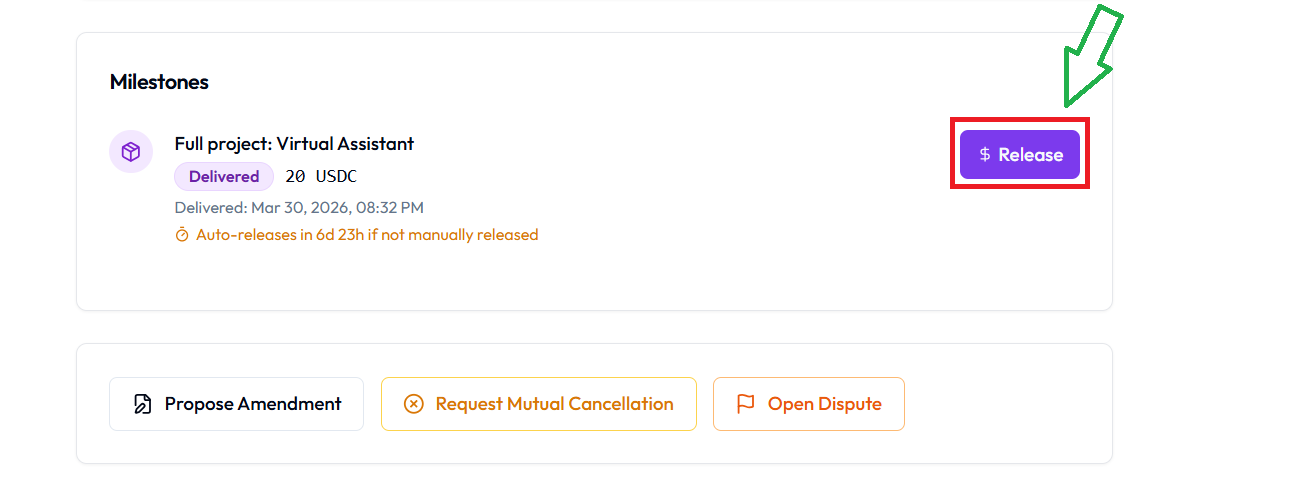
Step 6: Client reviews and releases payment
After the freelancer delivers, go to "Escrows" in your sidebar. Find the escrow and click the green Release button. This opens the full escrow details. Scroll down and click the purple Release button.
Your wallet opens with 2 final confirmation prompts. Approve both.
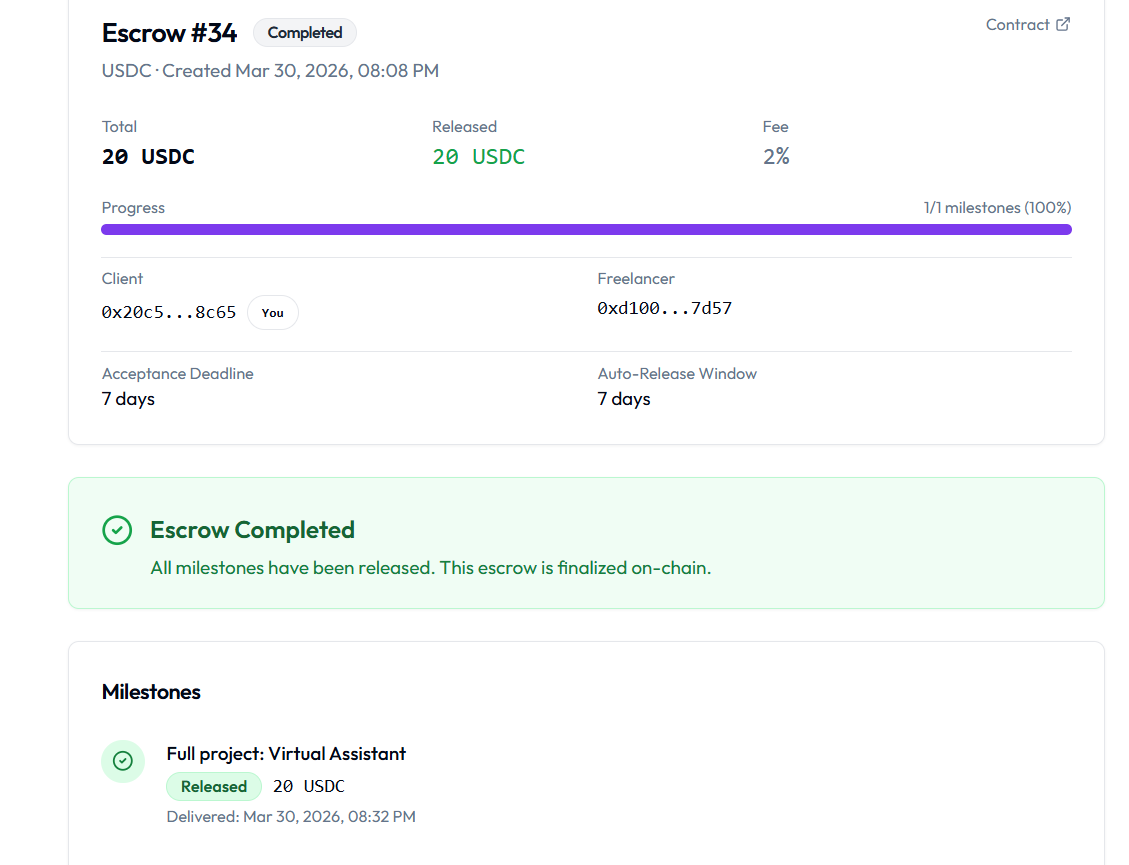
The payment is released to the freelancer instantly. The 2% fee is deducted automatically — the freelancer receives 98% of the milestone amount.
What if the client disappears after delivery? After 7 days with no action, the smart contract automatically releases the payment to the freelancer.
Step 7: Freelancer receives payment
Once the client releases (or the 7-day auto-release triggers), the funds land in the freelancer's connected wallet. The transaction is complete.
When things change: amendments
Projects evolve. Scope shifts. Deadlines move. GigRevo handles this without requiring a new escrow.
Either party can propose an amendment to an active escrow from the escrow detail page. You can restructure milestones, adjust amounts per milestone, or change deadlines. The total escrow amount must stay the same.
Both parties must approve. The amendment uses mutual digital signatures (EIP-712) and is executed on-chain. No gas fees.
When things don't work out: cancellation
Before the freelancer accepts: The client can cancel unilaterally from the escrow detail page. Full refund, no questions asked.
After the freelancer accepts: Either party can request a mutual cancellation. Both parties must agree and sign. The smart contract returns unreleased milestone funds to the client. Any milestones that were already released stay with the freelancer. No gas fees.
When there's a disagreement: disputes
Either the client or the freelancer can open a dispute on an active escrow from the escrow detail page. Disputes can be opened when the escrow is in "Accepted" status.
Once a dispute is opened, the escrow freezes. No auto-releases happen. No payments move. The funds stay locked in the smart contract until a GigRevo arbiter reviews the case.
Both parties submit evidence. The arbiter reviews everything and makes a decision. The resolution is recorded on-chain — fully transparent and verifiable on PolygonScan.
Connecting your Telegram bot account
If you also use the GigRevo Telegram bot (@gigrevo_bot), you can link your accounts so everything syncs — escrows, wallet, and history.
Two ways to link:
- From the bot: Type
/linkin the Telegram bot to get a 6-digit code. Enter it on the website in your account settings. - From the website: Simply sign in with the Telegram Login button. If your Telegram ID matches a bot account, they're linked automatically.
Once linked, escrows created on Telegram appear on the website, and vice versa.
Key differences: Website vs Telegram bot
| Feature | Website | Telegram Bot | | Wallet | Connect your own (MetaMask, etc.) | Custodial wallet created automatically | | Sign-in | Email, Google, or Telegram | Telegram account | | Request revision | Not available | Available (off-chain feedback) | | Escrow creation | Through project/proposal flow | Direct via /create command | | Gas fees | Zero (meta-transaction relay) | Zero (GigRevo sponsors) | | Withdrawals | Funds go directly to your wallet | /withdraw to external address |
Both channels interact with the same smart contract. An escrow created on Telegram can be managed on the website, and vice versa.
Referencia Rápida
¿Necesitas ayuda?
Escribe /support en el bot o envía un email a support@gigrevo.com. Visita gigrevo.com para la plataforma completa.